-Michael Jackson
 A DV tape. Unfortunately, the DV tape that had been provided already had footage on it, so we had to 'Black Out' the tape before we could proceed to film. Blacking Out the tape requires putting the tape into a camera, placing a cap over the cover of the lense so that its black, rewinding the tape to the beginning, and filming the cover of the camera until the tape is fully recorded. Then, we rewinded to the beginning, and began filming.
A Canon DM-XL2 Mini DV Camcorder. Lana and I had prior experience with this same model of camera in the past, filming our preliminary tasks and our AS Level Media coursework. This gave us a head start with our understanding on how to use the camera and its capabilities, but when filming, we learned more-such as the ability to change the brightness of the footage, using the round dial on the left side of the camera, located beneath the viewing hole.
 A Mini DV player. This player allowed us to insert the DV tape, and then transfer the videos on the tape over onto the computer, using the Capture function in Adobe Premiere.

A tripod and a dolly. The tripod connects to the dolly, allowing the steadily held camera to be moved around smoothly. Whilst most of the filming this time round was done via placing the camera on one's shoulder, our prior knowledge into using this equipment from AS levels gave us the upper hand on the occasion we did use it.


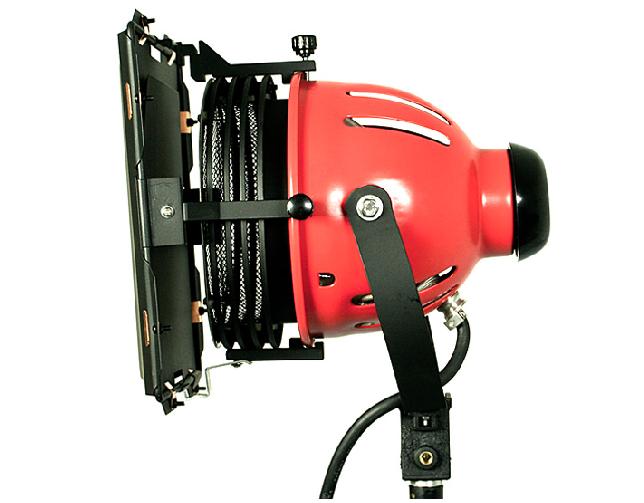
A redhead. This bright light enabled us to film most of the scenes with the swaying lights, such as the needle eye shot. The panels at the front allow us to shape how precise the direction of the light is, which helped to make the angles of lighting more effective. An issue I had with this piece of equipment is that it heated up very fast, and I had to be careful to not break the bulb.

The Adobe Premiere Shortcut Keyboard. This color-coded piece of equipment allows me to use Adobe Premiere's functions a lot faster, without relying on mouse control and so on. For example, pressing 'C' activates the Cut function, and pressing 'V' returns back to normal mouse control.
This comment has been removed by the author.
ReplyDelete